- Toshendra Kumar Sharma
- October 14, 2022
Most of the people spend hours & days to get their Go Ethereum client synced to start the Ethereum or Solidity development. But they face tons of problems in doing that and end up getting frustrated leading to no progress or huge delay in the development.
There are many reasons for this:
- Go Ethereum Client for Mainnet needs to sync the entire Blockchain which is in multiple GBs right now. Not everyone has the 1TB of HD, especially the MacBook owners.
- Sync is very very slow, for my Ubuntu based machine it took more than a month on EC2 server which has very fast internet. So it’s not the internet problem.
- Many sync bugs halt the syncing leading to start from scratch.
- Too much confusion regarding on which testnet the node is running when the network is switched to Testnet as there is no clear name. Ropsten, Kovan, Rinkbey are some of the testnets which are good for the testing. Ethereum & Mist wallet does not show you the name of the test net easily.
If all the above issues are frustrating you then you must switch to Ethereum’s Parity node which is designed to overcome these issues. This not only syncs everything fast but also gives you very nice Dapp browser & web interface to interact with the Ethereum network along with other powerful features.
Parity to the Rescue
Parity is the Ethereum node designed to overcome many of the issues which exist in the other Ethereum clients & wallets (Ethereum & Mist wallet). As per their website “fastest and lightest Ethereum client and integrated it directly into your web browser. Using it you can access all the features of the Ethereum network including powerful Decentralised applications and the multitude of crypto currencies issued on Ethereum.”
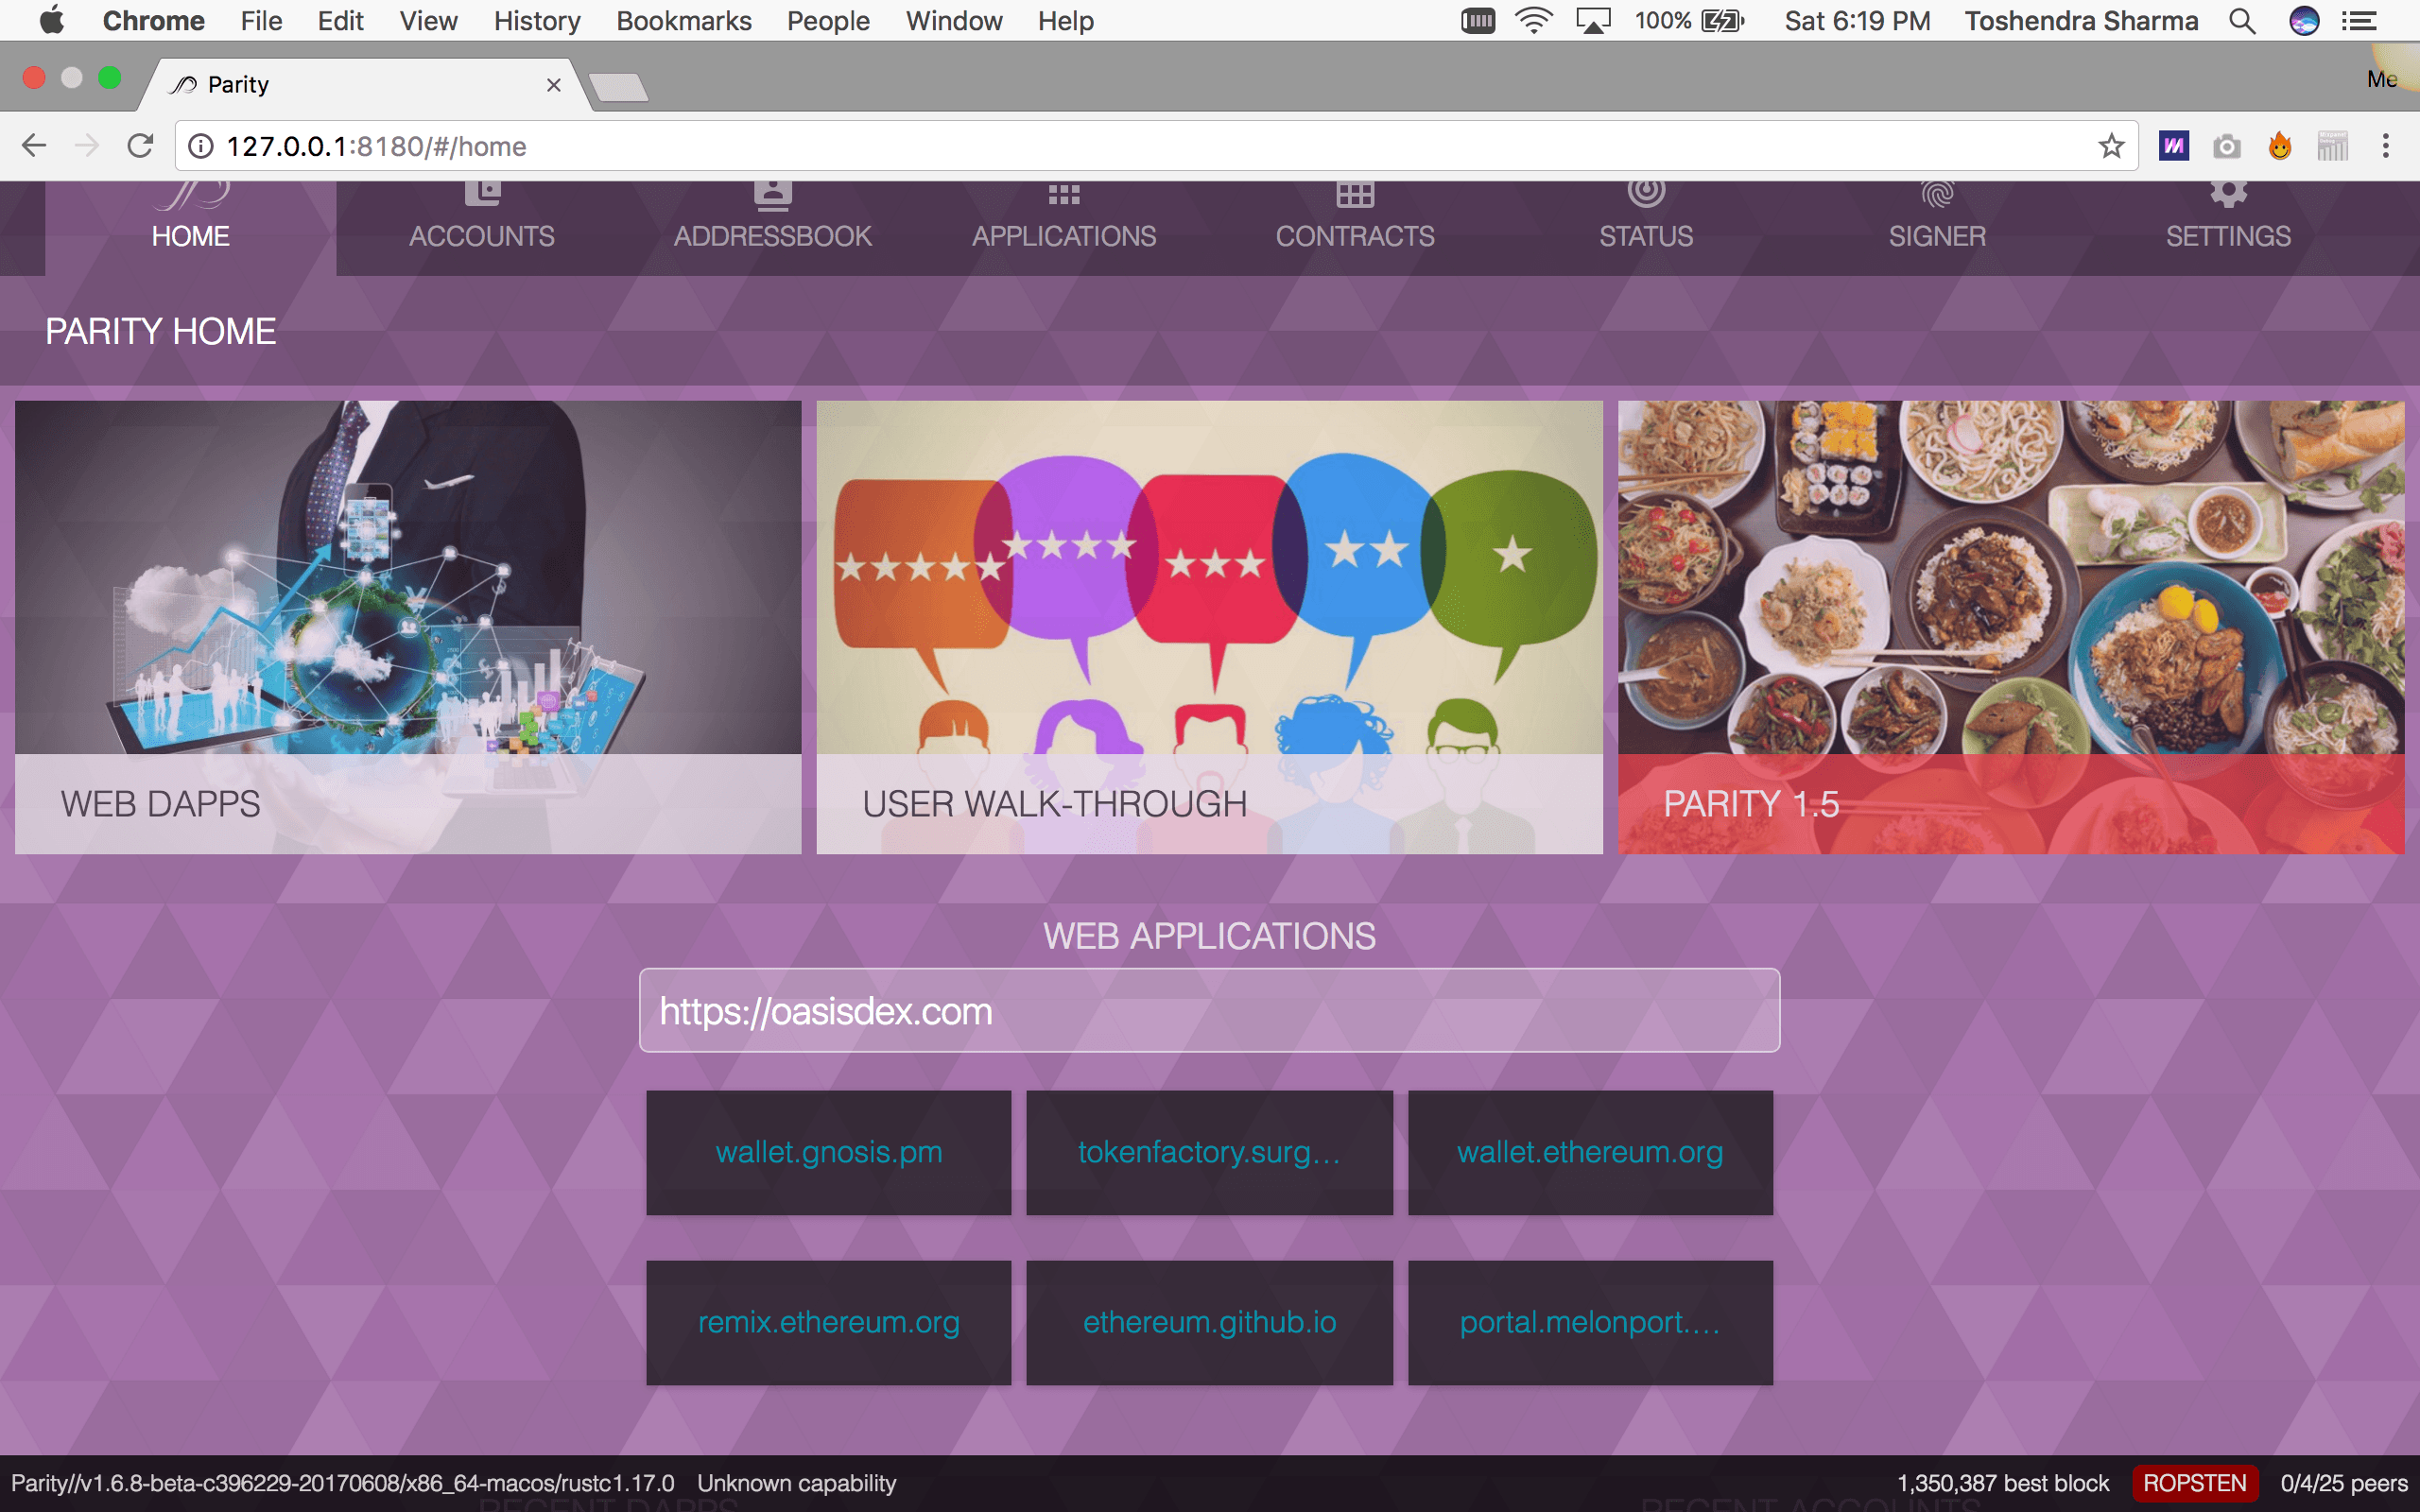
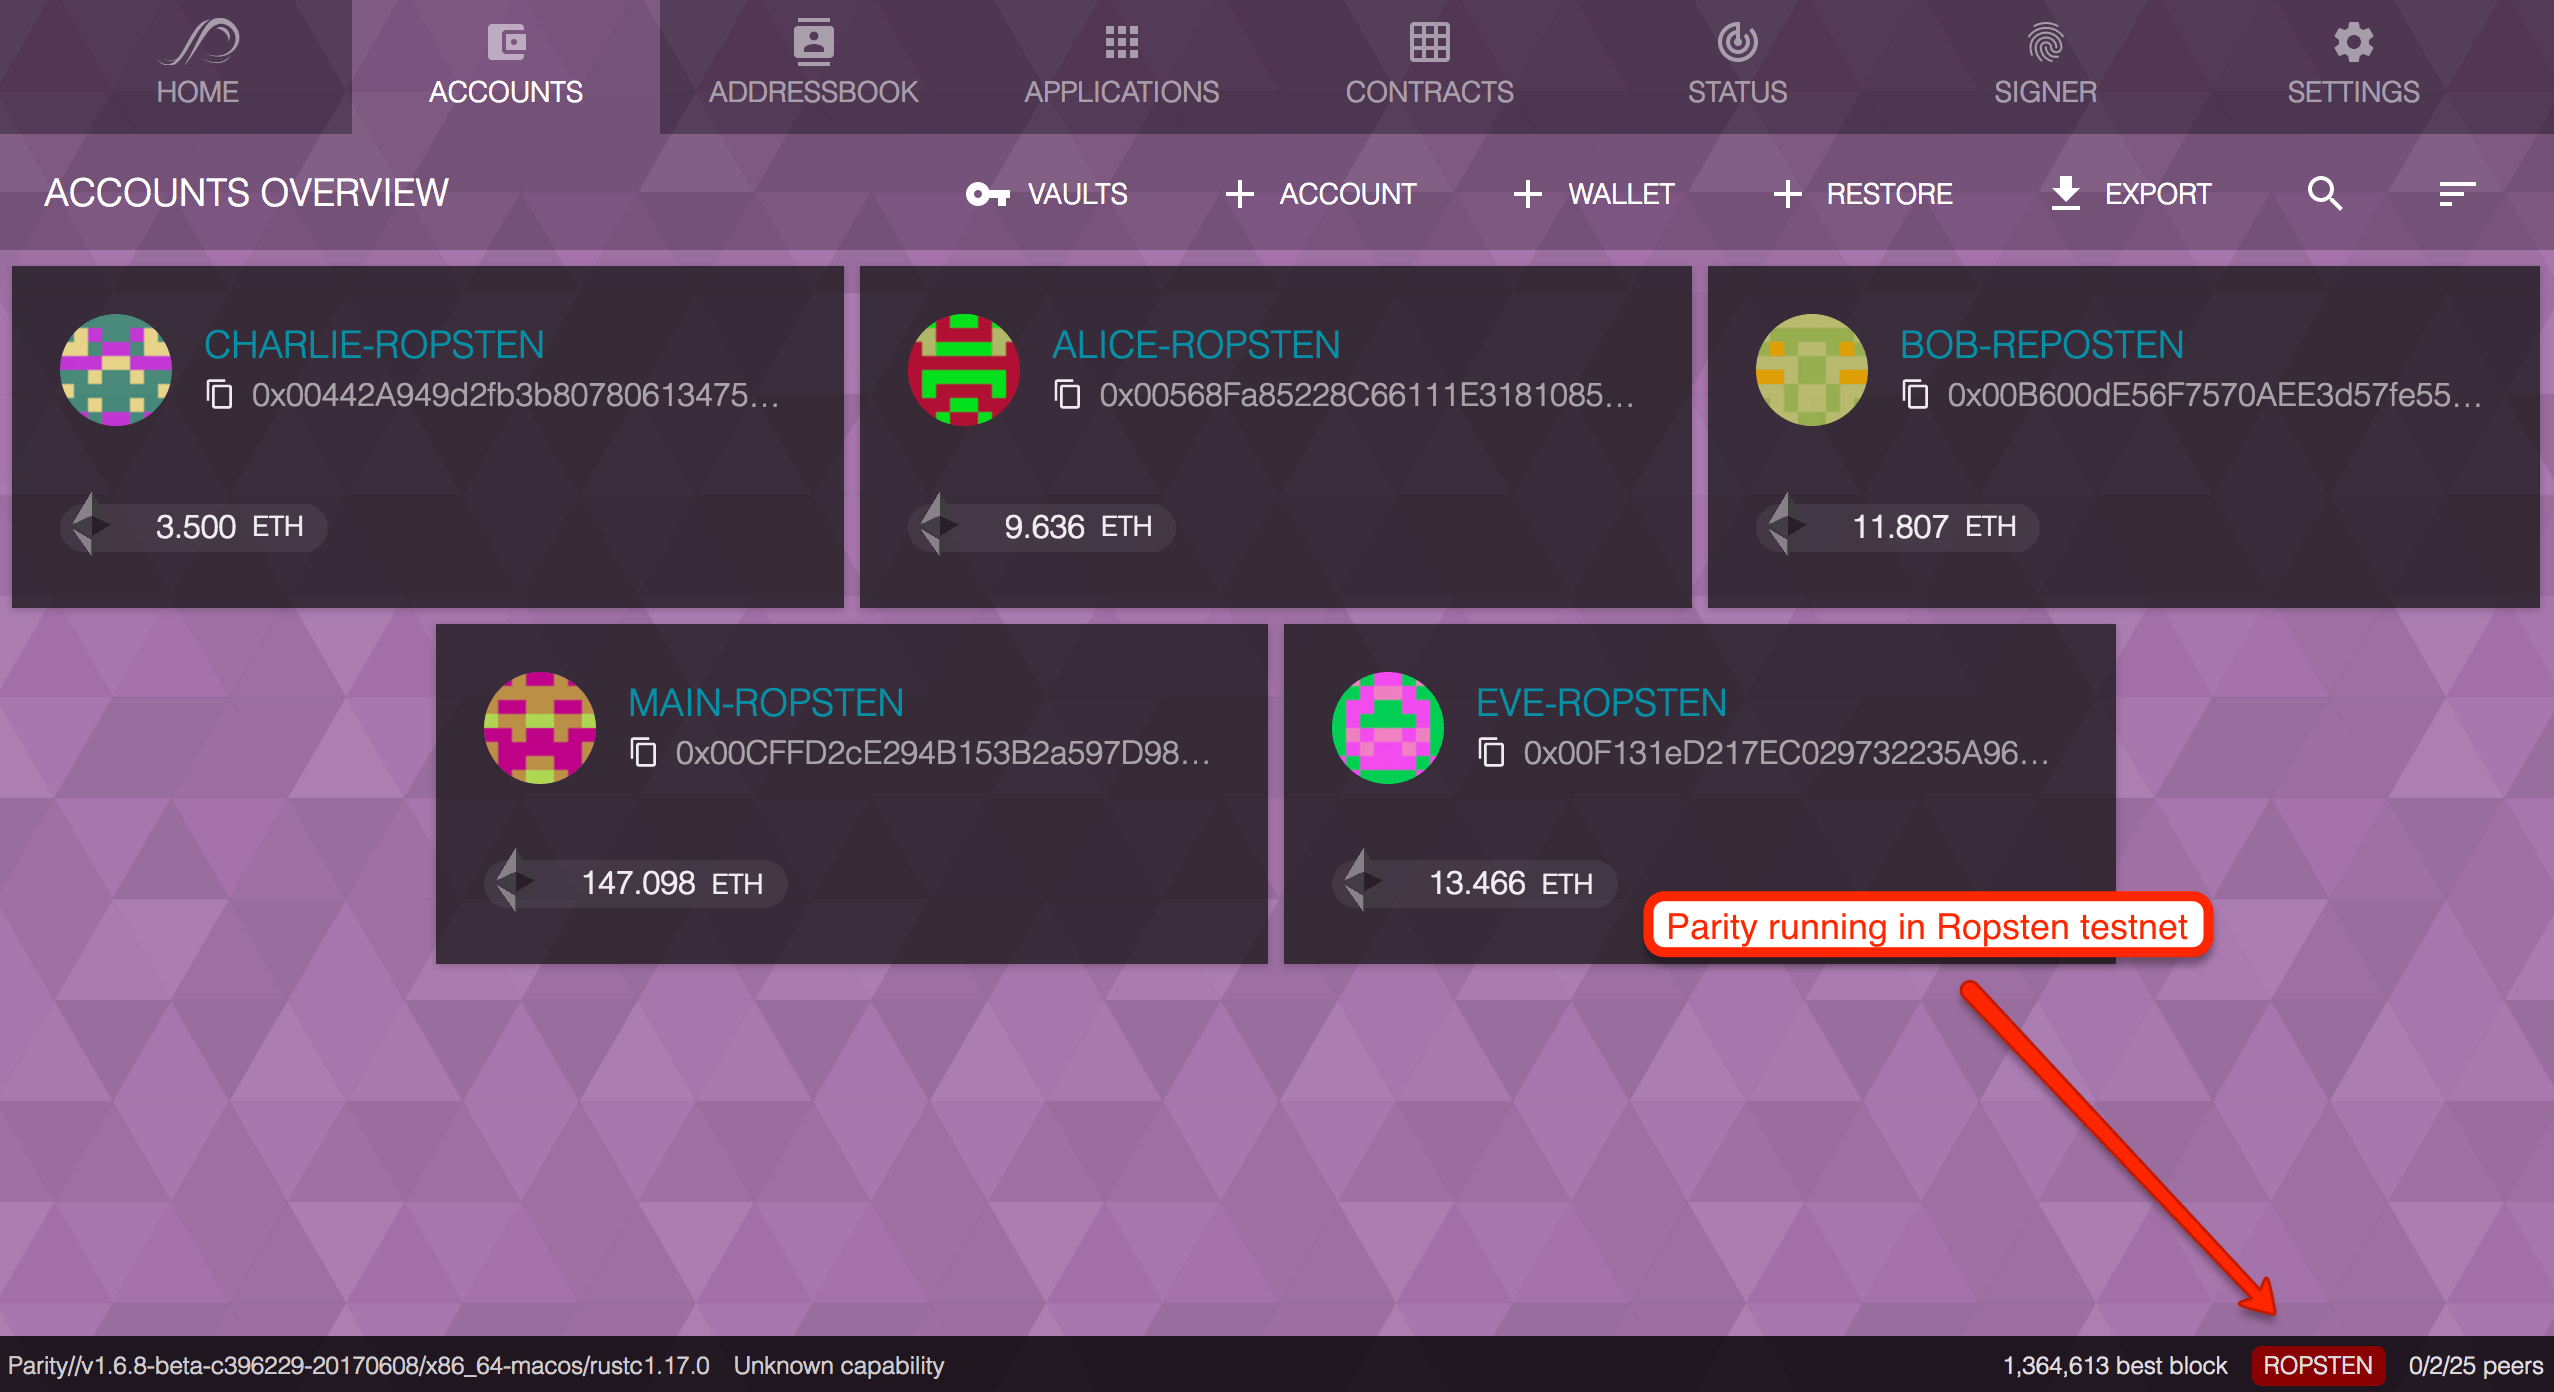
Below is the screen of the parity UI after the installation. As you can see in the right bottom corner this is connected to Ropsten testnet.
How to install parity?
Currently, Parity is available in Ubuntu, Mac, Windows & as Docker Images. Installing parity in Mac & Ubuntu is as simple as typing a single command.
[pastacode lang=”bash” manual=”bash%20%3C(curl%20https%3A%2F%2Fget.parity.io%20-Lk)” message=”One-line installer of Parity in Mac or Ubuntu” highlight=”” provider=”manual”/]
For windows, you can download the parity installed from here.
For the Docker image, you can download it from the same above link.
Once the Parity is installed, it’s time to start it using the terminal.
How to use Parity?
Before running a parity you can optionally install the geth & ethminer in your system so that you can mine some test ethers for the testing.
Installing Geth
If you haven’t already done it, to install geth use the instructions from this link, remember the syncing is not required here. We just want you to install it. Though installing the geth is completely optional.
Installing ethminer
Ethminer is the ethereum miner to miner the block into the Blockchain network =. If connected to testnet, this will mine the test network for the test ethers. Which is exactly what we want. So we will connect to the ropsten testnet & then try to mine some ropsten ETH. You can install the ethminer as per instructions in this link.
Launching Parity with Ropsten as a Testnet
[pastacode lang=”bash” manual=”parity%20–chain%20ropsten” message=”” highlight=”” provider=”manual”/]
The above command will launch the parity node in the ropsten testnet. The screen will look like this below. Please note that this will take 2-3 hours to sync the entire Ropsten Blockchain and will take very less space. This is much faster and quicker than Ethereum wallet or Mist Wallet which takes many days.
This how the web interface will look like.
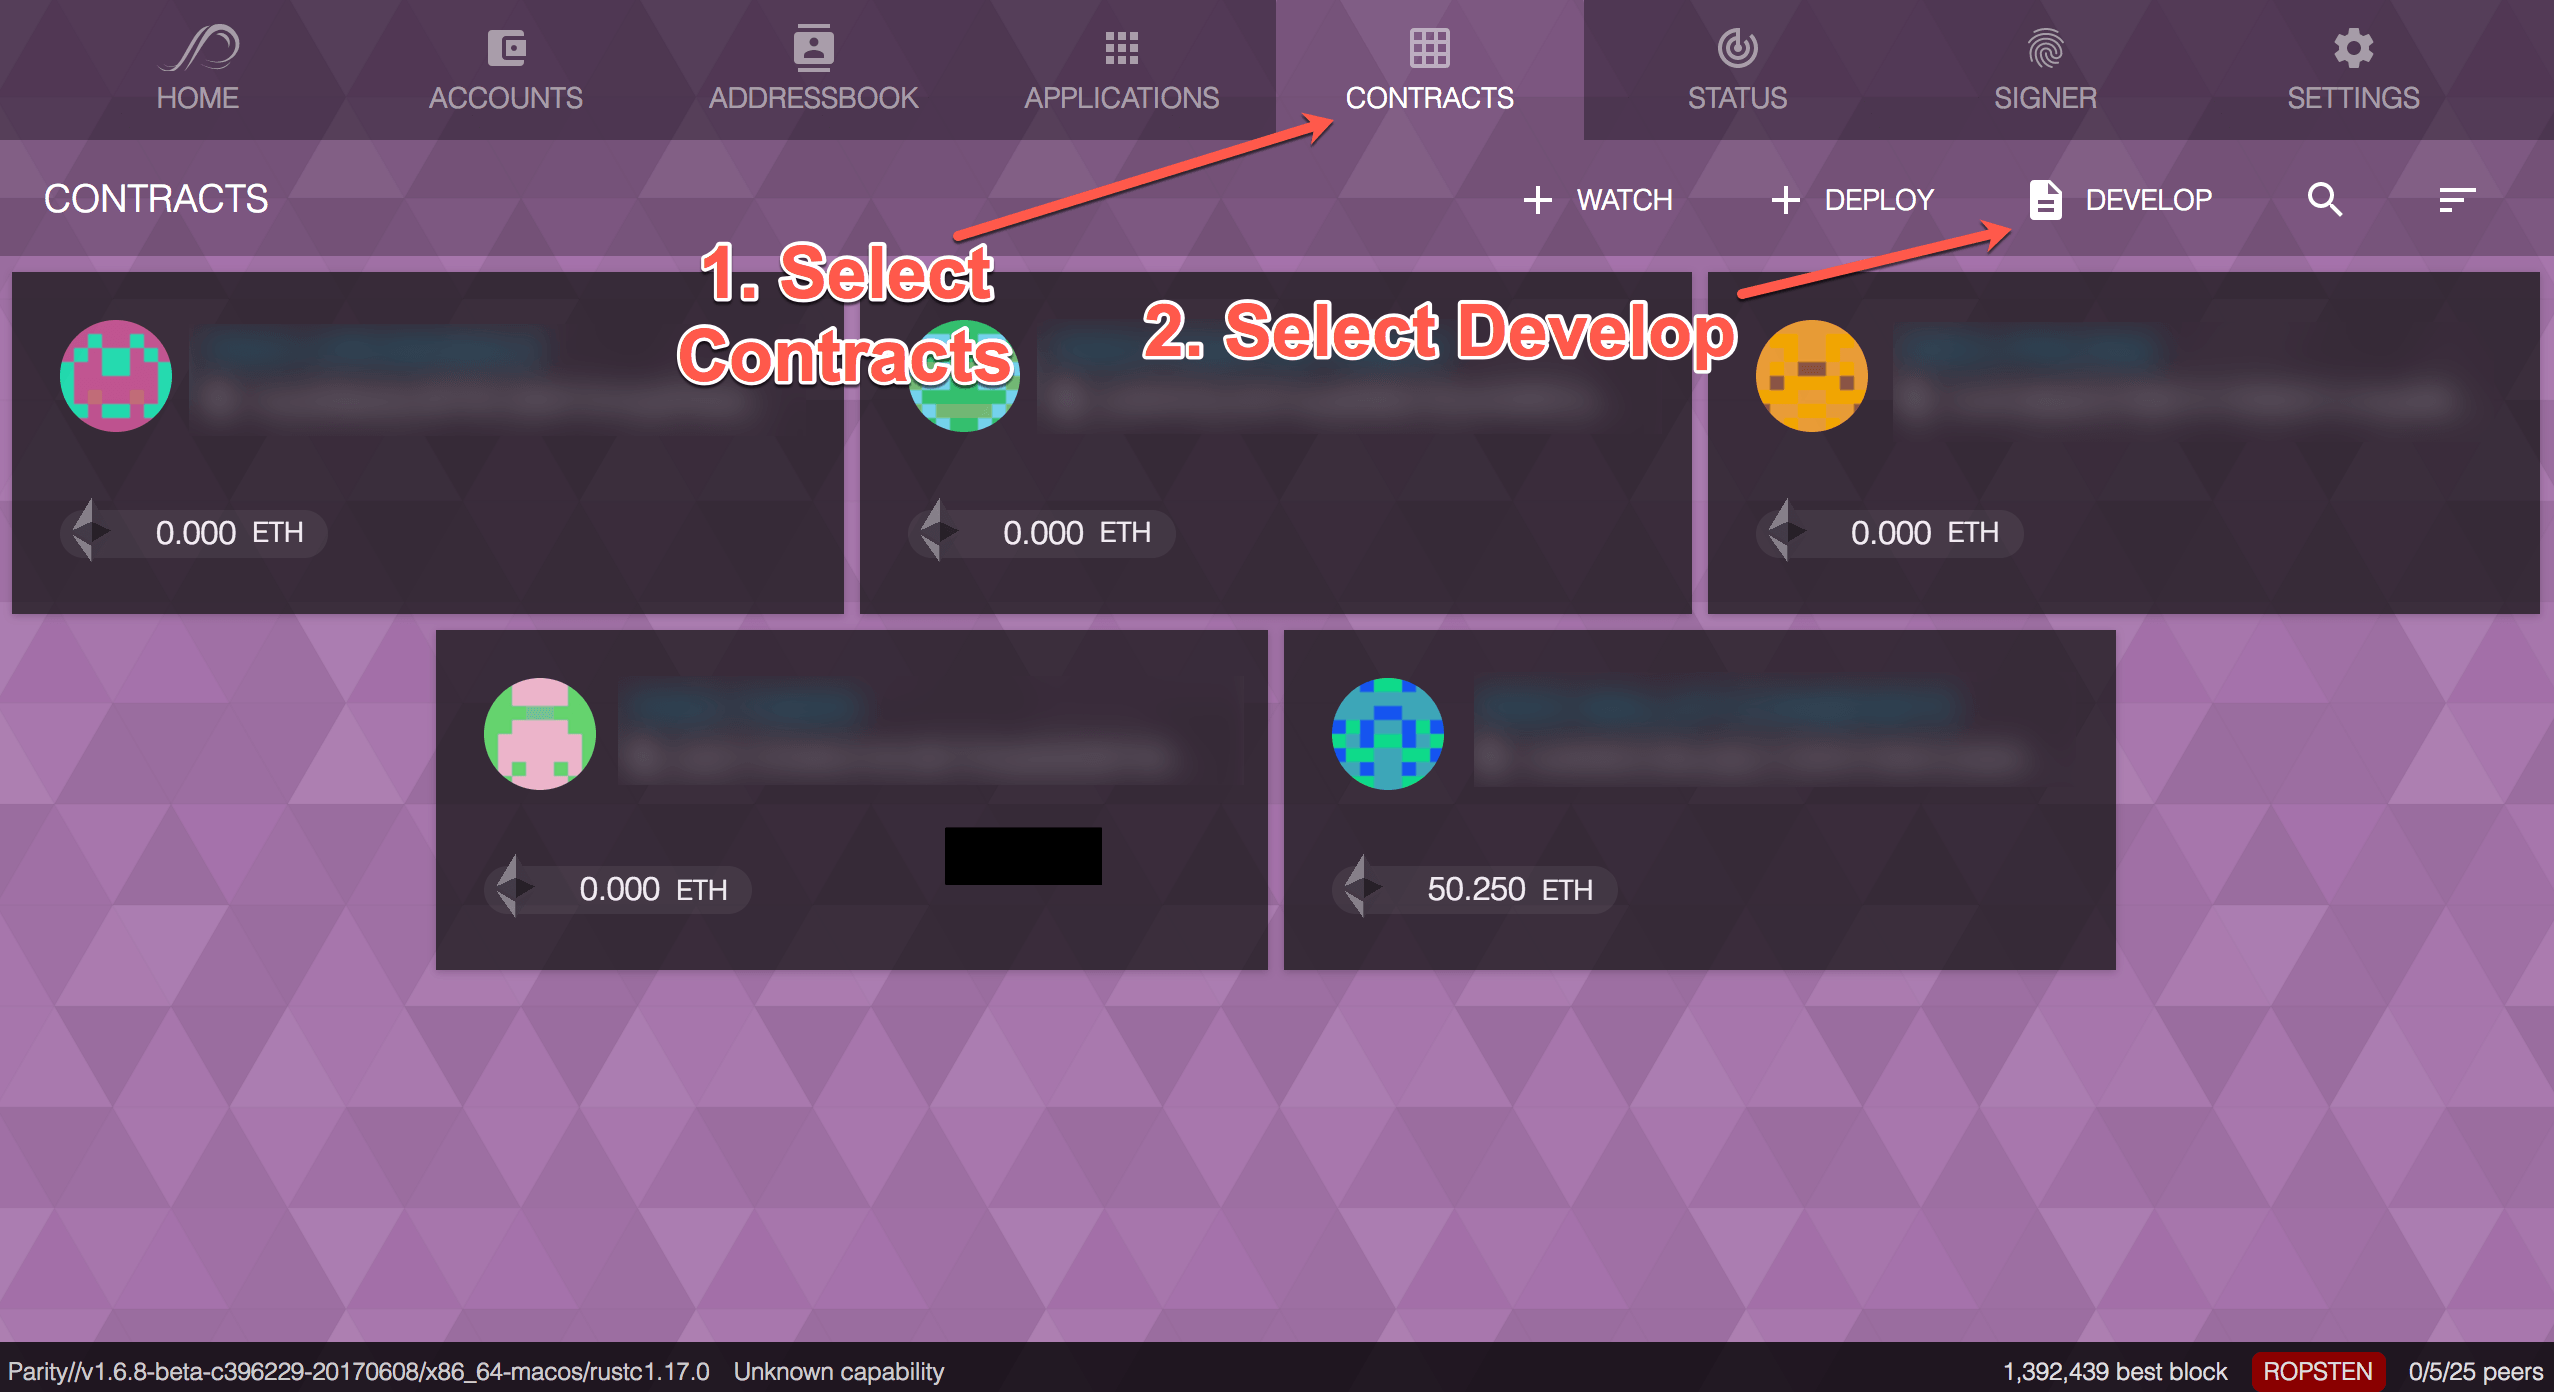
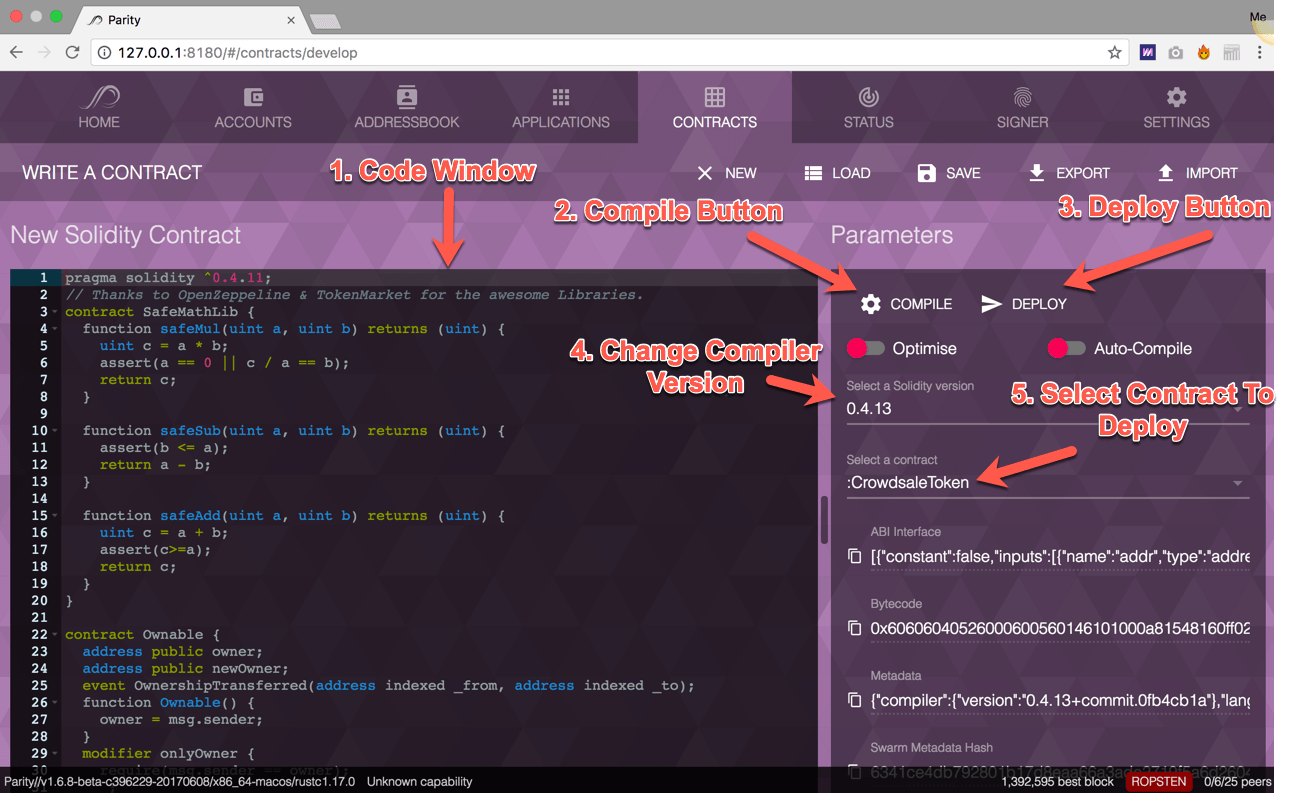
You can now go to “Contracts” menu item on the top
Before you deploy any smart contract in Ropsten, you will need some of the Ropsten Ethers in your account. To get the Ropsten ETH you have to follow the below instructions.
- Options 1: You can use Faucet to get the ETH to start your testing. Check this Ropsten faucet here.
- Options 2: Mine your own Ropsten ETH. You have to wait for few hours to get your Ropsten ETH mined in your account.
How to Mine Ropsten ETH for the development?
Important: You don;t need any specific & advanced hardware to mine Ropsten ETH as this is very easy to help people quickly get ready for the development.
Before you start mining Ropsten ETH you must have an etherbase account in which you will get your ETH.
Step1: To do that first go to the accounts menu item in your parity web interface and then click create an account to create a new account. Please remember your first Ropsten Account will be your etherbase account.
Step 2: make sure you have ethminer install as mentioned in the beginning of this article.
Step 3: Stop the parity node (if it is already running) and start it again using the below command.
[pastacode lang=”bash” manual=”parity%20–chain%20ropsten%20–author%20%3Cyour%20etherbase%20account%3E” message=”” highlight=”” provider=”manual”/]
using the above command the parity will collect all the mined Ropsten ETH in the mentioned account.
Step 4: Now launch the ethminer in the new terminal using below command.
[pastacode lang=”bash” manual=”ethminer” message=”” highlight=”” provider=”manual”/]
Now you will see the message as shown in the below image. It will take some time in creating the DAG (Directed Acyclic Graph) & then start mining. Leave the machine overnight to get some 50-100 ETH for the testing. This much ETH will be good enough for the testing.















































 Guides
 News
News Blockchain
 Cryptocurrency
& Digital Assets
 Web3
Web3 Metaverse & NFTs